Backend Installation Process
Step 1:
Open the terminal. First of all, you need to deploy the backend in your Domain or Subdomain. But we recommend subdomain actually. For example, backend.your_main_domain@something.com. Now you need to zip the roofstick-backend file.
Step 2:
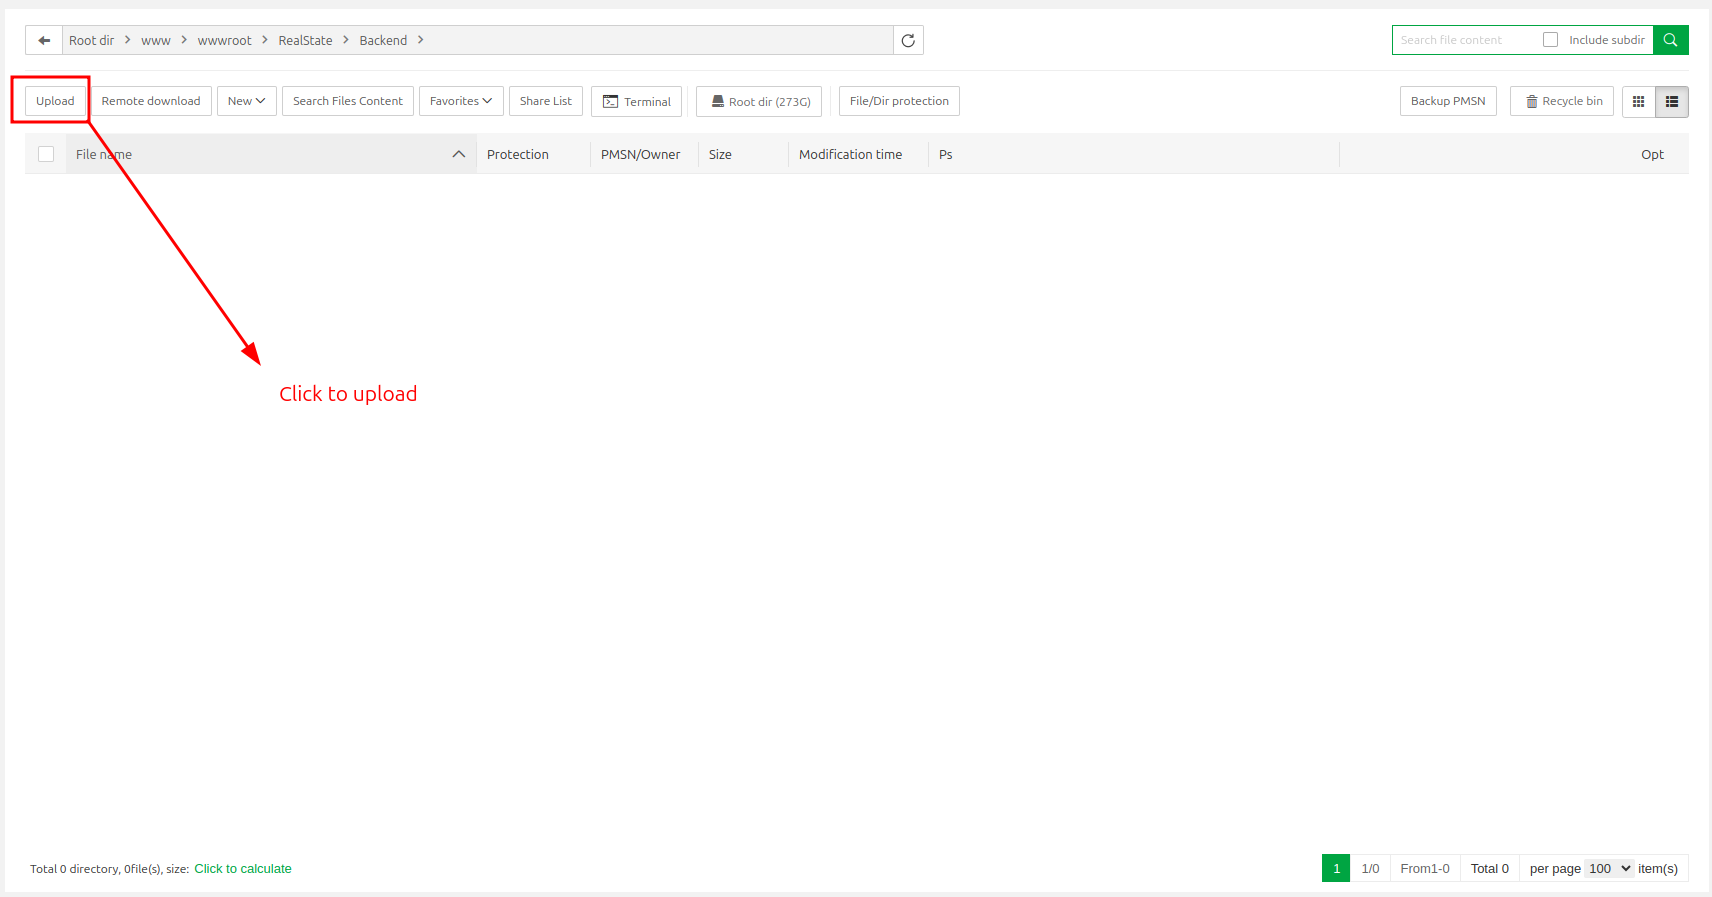
Then you have to go to your file manager of your server panel or cPanel, then upload the backend.zip file.
Step 3:
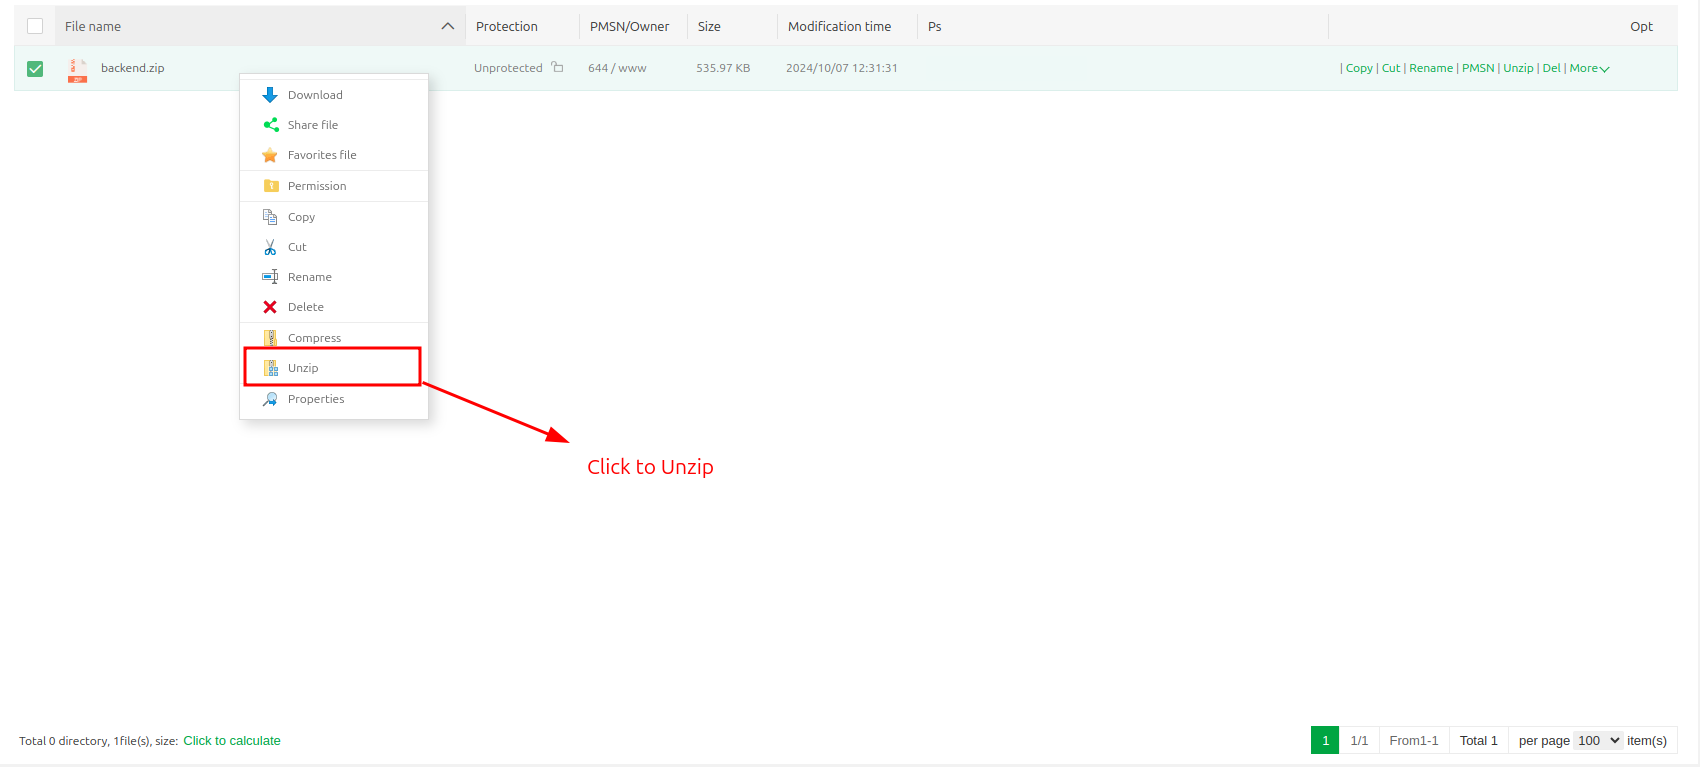
Then Unzip the file,
Step 4:
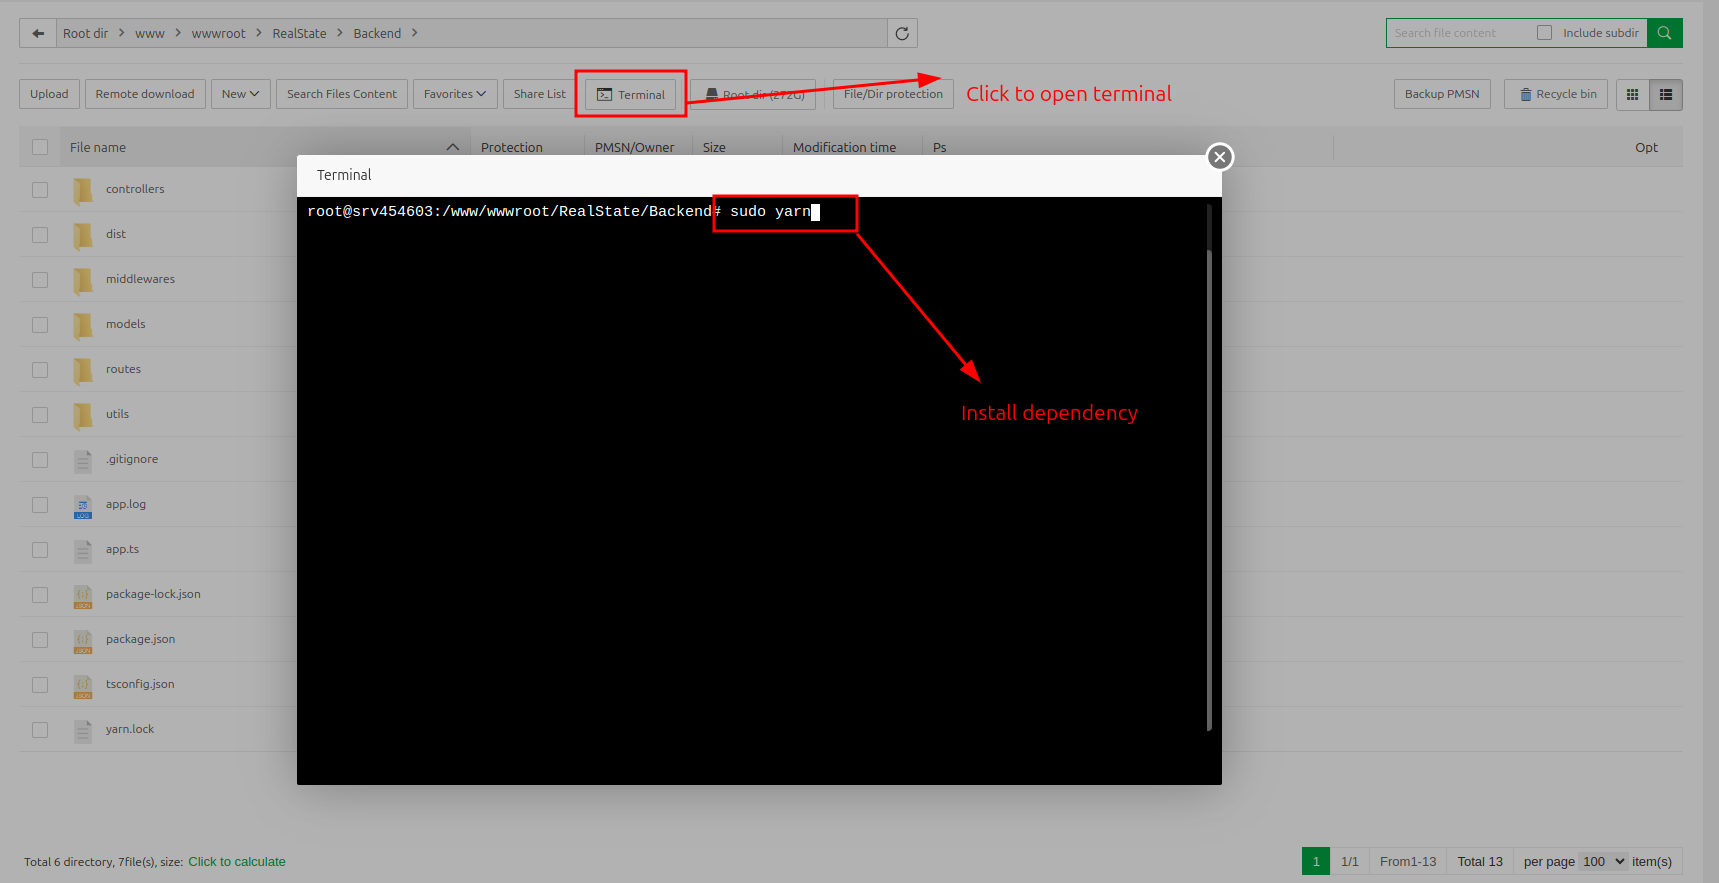
Open your terminal and enter sudo yarn command and hit enter,
Step 5:
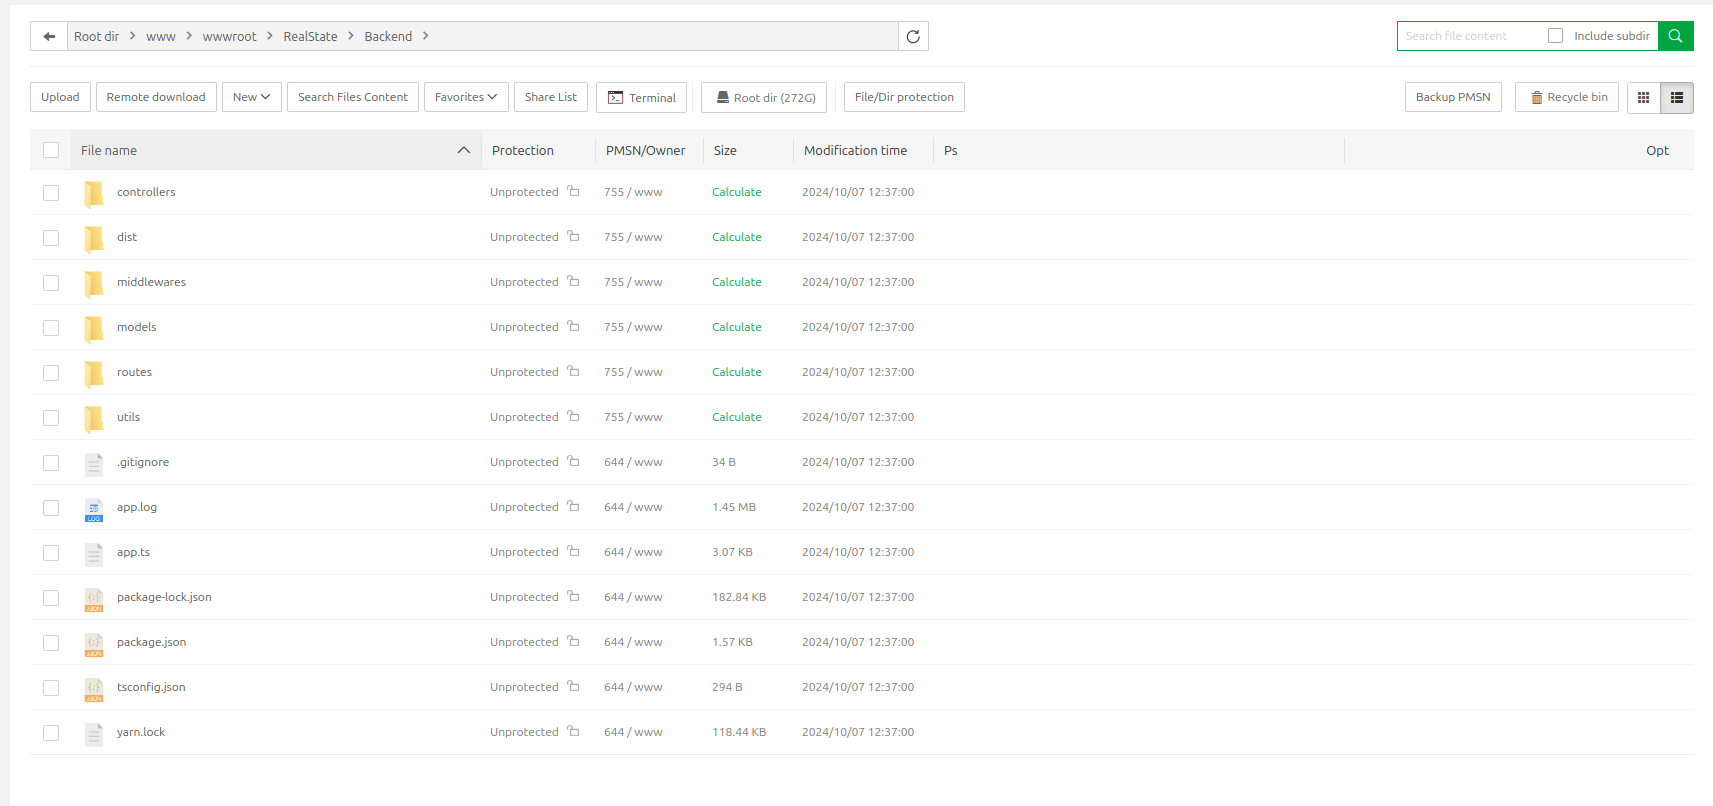
Now you can see the uploaded files And You can see node_modules.
Step 6:
Then you can find the Website button on the sidebar and click on it.
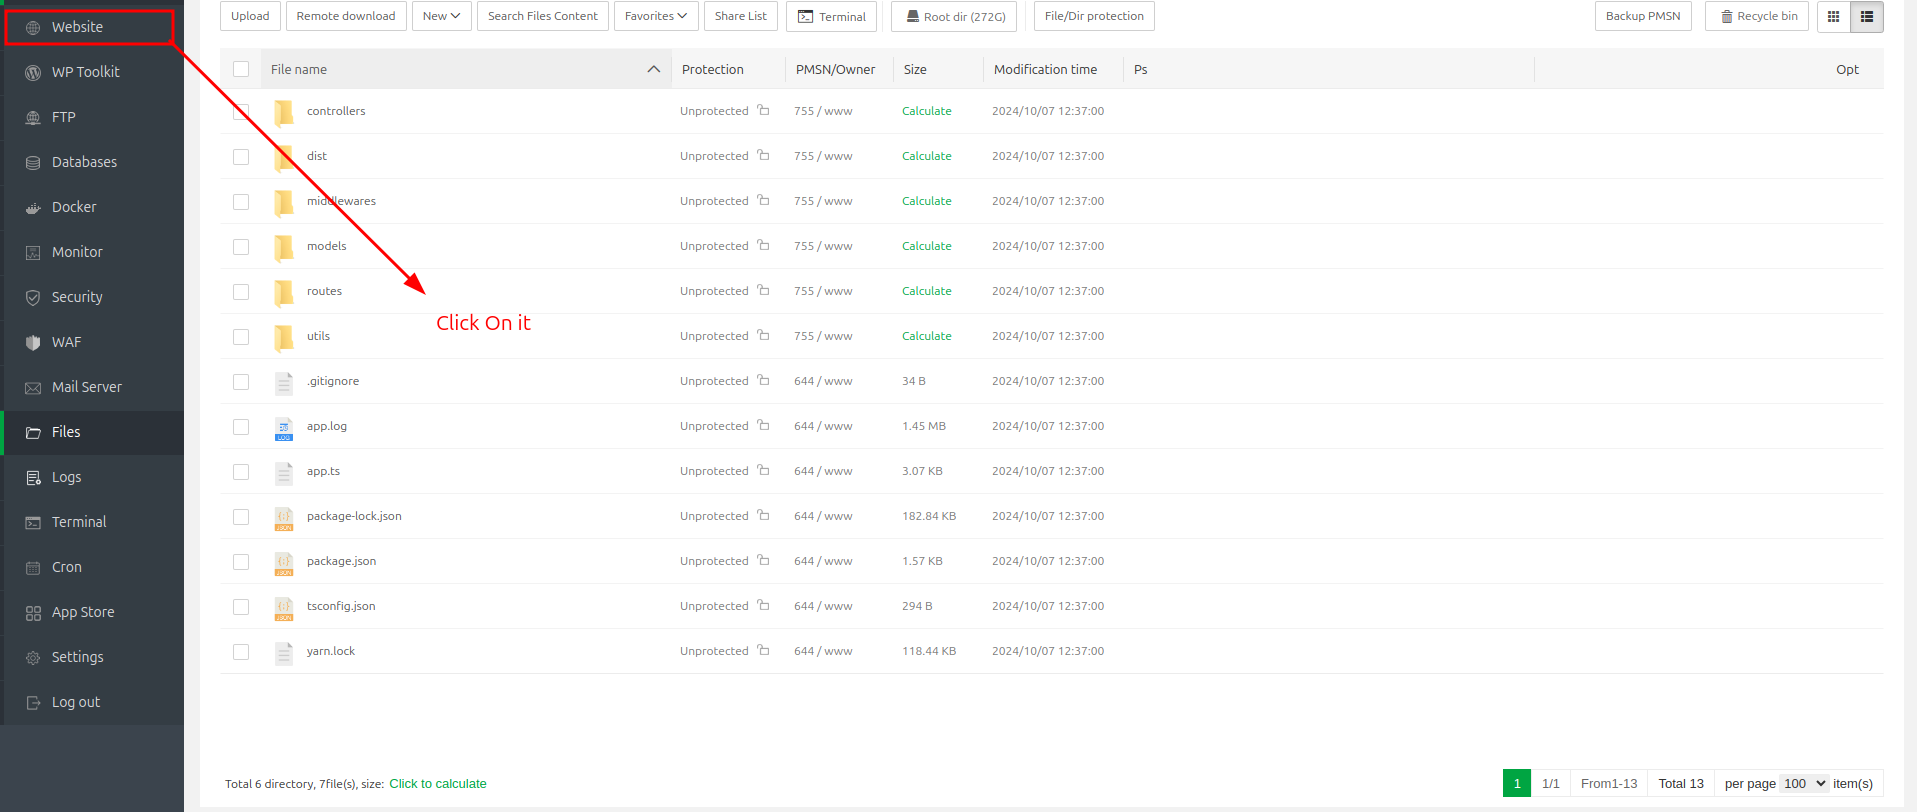
Step 7:
Then you can find the Node Project button on the top and click on it. Then click add node project button
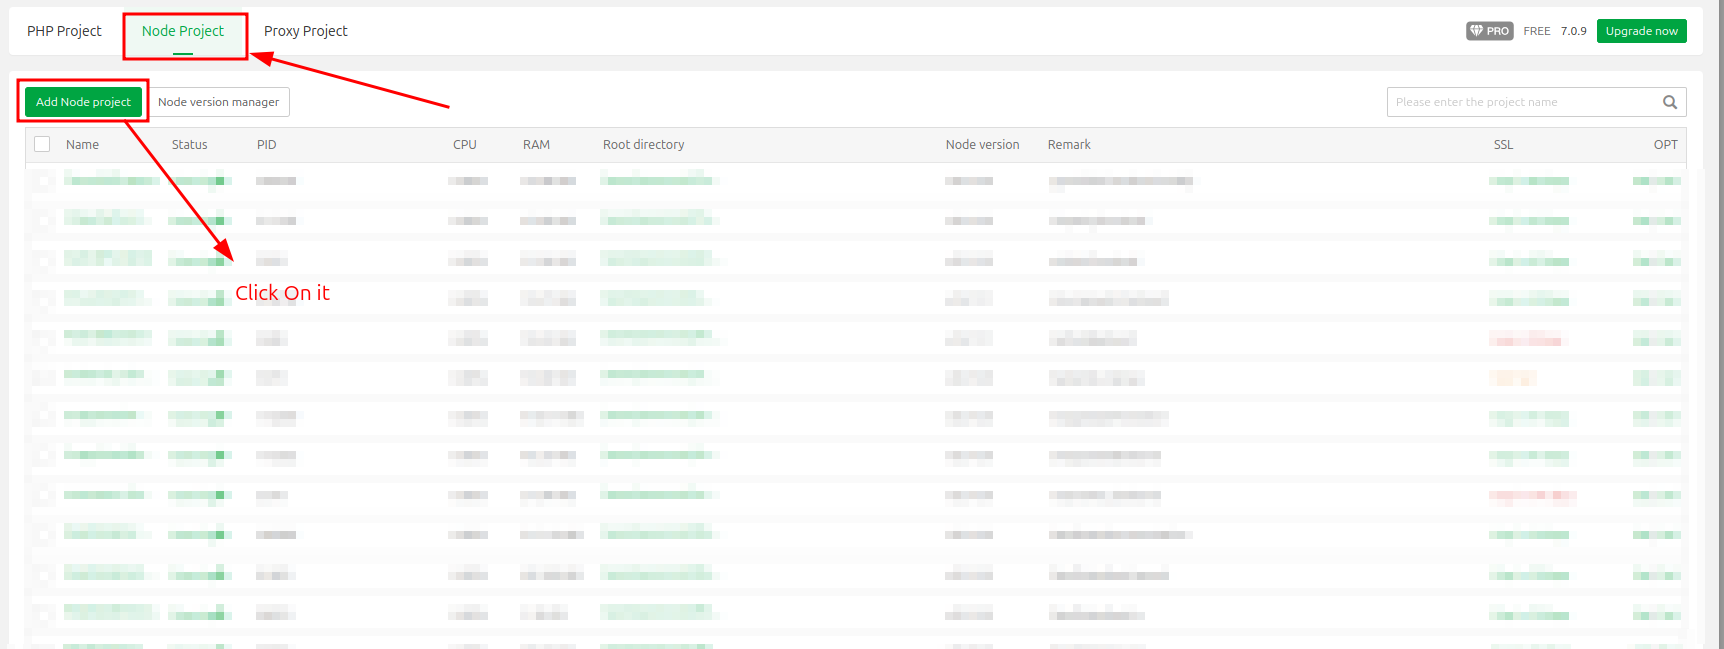
Step 8:
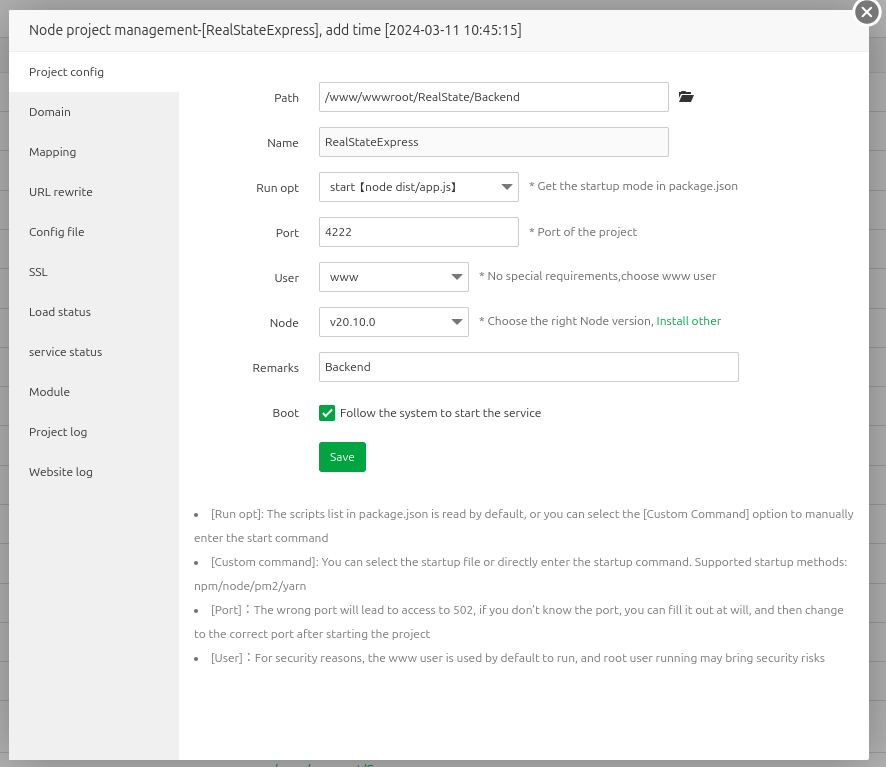
Then click the pointed button,
-
to select your folder path,
-
fill up the Name, (do not give line space in the name, use underscore)
-
select Run opt,
-
select the port,
-
select node version,
-
and give your domain name Then click on confirm button. Make sure all information is correct.
Step 9:
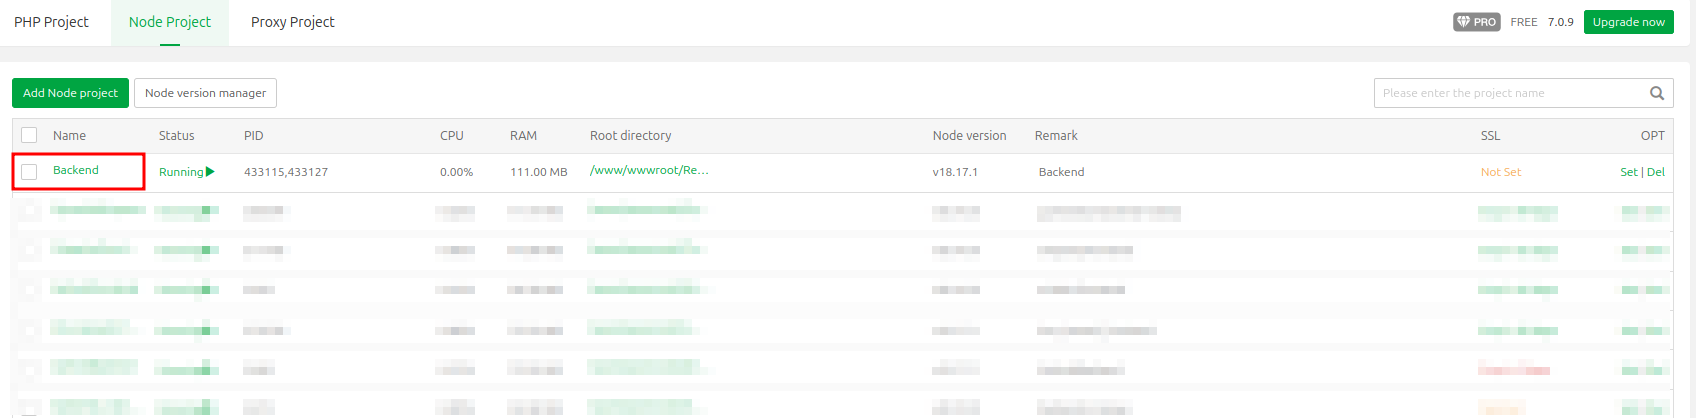
Then click the file and right-click on your mouse, then you can get a new window
Step 10:
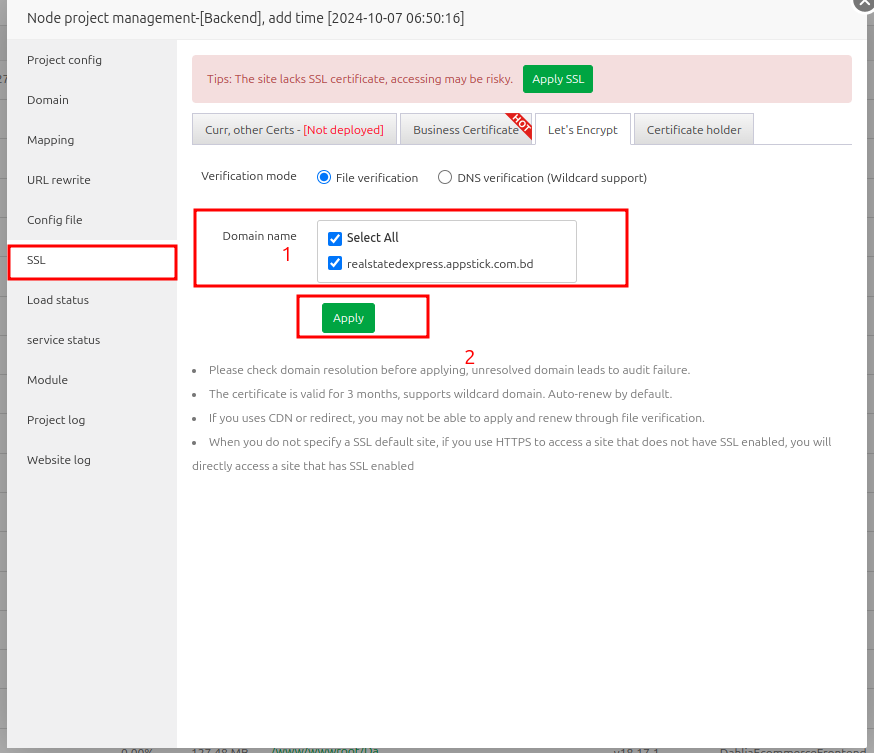
Then Click SSL, then select two checkboxes and apply them
Step 11:
If SSL not apply then click to force SSL that found in right site.
** Now your backend project is ready to use. Please copy your subdomain URL to run your frontend project. For example, backend.your_main_domain.com. **